
Understanding Your GE Self-Cleaning Oven
GE self-cleaning ovens simplify kitchen maintenance, eliminating harsh chemicals and scrubbing․ This guide provides step-by-step instructions for optimal oven cleanliness and performance․
Self-cleaning technology in GE electric ovens utilizes extremely high temperatures – far exceeding normal baking heat – to pyrolyze food residue․ This process transforms spills and splatters into a light ash, easily wiped away after the cycle completes․ This innovative feature eliminates the need for abrasive cleaners and strenuous scrubbing, offering a convenient and effective solution for maintaining a pristine oven interior․ It’s a significant advancement in oven care, saving time and effort․
GE Oven Models with Self-Clean Feature
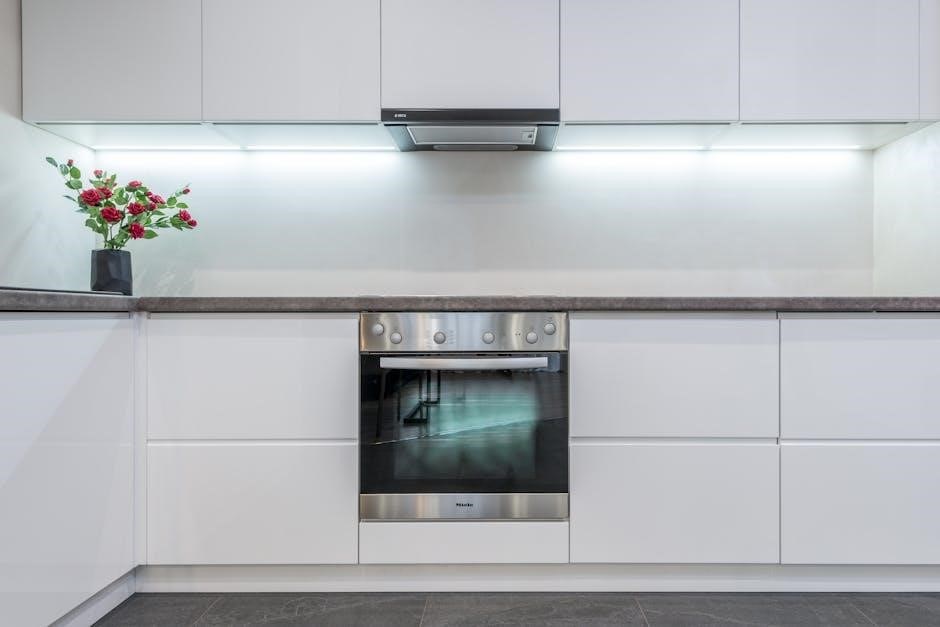
Many GE electric oven models boast the self-clean functionality, including those from the Profile, Slate, and Stainless Steel series․ Specific models like JBP25, JBP45, JBP46, JBP47, JBP24, JBP26, JBP19, JBP21, and JBP48 are equipped with this feature․ Always consult your oven’s user manual to confirm self-clean availability and specific operating instructions tailored to your particular GE oven model for optimal performance and safety․
Preparing for the Self-Clean Cycle
Before initiating the self-clean cycle, remove oven racks and accessories․ Ensure the oven door locks correctly and proper kitchen ventilation is available․
Removing Oven Racks and Accessories
Prior to starting the self-clean cycle on your GE oven, it’s crucial to remove all oven racks, broiler pans, and any other accessories stored inside․ Some GE oven models may allow racks to remain during the cycle, but checking your specific manual is vital․ Removing these items ensures they aren’t damaged by the high temperatures․ A thorough removal prevents potential discoloration or warping, maintaining their longevity and functionality․ Always handle racks with care, as they can become hot during previous cooking cycles․
Checking Oven Door Lock Functionality
Before initiating the self-clean cycle on your GE electric oven, verify the oven door lock operates correctly․ The lock automatically engages during the high-temperature cleaning process for safety․ Gently attempt to open the door; it should remain securely locked․ A malfunctioning lock prevents the cycle from starting or poses a safety hazard․ Consult your oven’s manual if the lock doesn’t engage or disengage properly․ Never attempt to force the door open during the self-clean cycle․
Ensuring Proper Ventilation
Adequate ventilation is crucial during the self-clean cycle of your GE electric oven․ The high temperatures can release odors and potentially some smoke․ Open kitchen windows or turn on the exhaust fan to maintain good air quality․ This prevents the buildup of fumes and ensures a comfortable environment․ Avoid prolonged exposure to any released odors․ Proper ventilation safeguards both you and your kitchen during the cleaning process․

Initiating the Self-Clean Cycle
To begin, remove racks and lock the GE oven door․ Select the desired cycle duration, understanding the process involves high temperatures for thorough cleaning;
Selecting the Self-Clean Cycle Duration
GE ovens typically offer varying self-clean cycle lengths – light, normal, and heavy – to accommodate different levels of soiling; A light cycle, around two to three hours, suits minor spills and residue․ The standard cycle, lasting three to four hours, is ideal for typical cleaning needs․
For heavily soiled ovens, a heavy cycle, potentially exceeding four hours, provides the most intense cleaning․ Refer to your oven’s user manual for specific duration recommendations and to understand the energy consumption associated with each setting․ Choosing the appropriate duration ensures effective cleaning while optimizing energy use․
Locking the Oven Door
Prior to initiating the self-clean cycle, ensure the oven door is securely locked․ GE ovens feature an automatic locking mechanism that engages when the cycle begins, preventing accidental opening during the high-temperature process․ This safety feature is crucial, as opening the door mid-cycle could cause severe burns․
Do not attempt to force the door open while locked․ The lock will automatically release once the oven has cooled sufficiently․ Verify the lock functions correctly before each self-clean cycle to maintain safety and ensure a complete cleaning process․
Understanding the High-Temperature Process
The self-clean cycle utilizes extremely high temperatures – exceeding 880°F (470°C) – to incinerate food residue within the oven cavity․ This intense heat converts spills and splatters into a fine ash․ During this process, some smoke and odors are normal, but excessive amounts warrant attention․
The GE oven is designed to withstand these temperatures, but it’s vital to ensure proper ventilation․ Avoid touching the oven during or immediately after the cycle due to the extreme heat․ Allow ample cooling time before accessing the interior․
Monitoring the Self-Clean Cycle
Observe the oven temperature and listen for normal sounds during the self-clean cycle․ Avoid opening the oven door until fully cooled․
Observing the Oven Temperature
During the self-clean cycle, your GE oven will reach extremely high temperatures, typically exceeding 800°F (427°C)․ While the oven manages this internally, it’s crucial to understand this process․ The oven’s control panel may display the current temperature, or indicate it’s in clean mode․
Avoid touching the oven glass or any exterior surfaces, as they will become intensely hot․ The high heat effectively burns off food residue, turning it into ash․ Regularly monitoring ensures the cycle proceeds as expected, though direct temperature reading isn’t always necessary due to automated controls․
Recognizing Normal Sounds and Smells
The self-clean cycle on your GE oven will produce some unusual sounds and smells, which are generally normal․ You might hear clicking or popping noises as the oven heats and cools, and the metal expands and contracts․ A burning smell is also common, as food residue is incinerated at high temperatures․
These sounds and smells should diminish as the cycle progresses․ However, if you detect strong chemical odors or excessive smoke, immediately stop the cycle and ventilate the kitchen, following safety precautions․
Avoiding Oven Door Opening During Cycle
It is absolutely crucial to avoid opening the oven door during the self-clean cycle․ GE ovens are designed with a locking mechanism to prevent accidental opening due to the extremely high temperatures reached – potentially causing severe burns․
Interrupting the cycle can also damage the oven’s components and affect the cleaning process․ Trust the automated system; allow it to complete the cycle undisturbed for optimal results and safety․
Post-Self-Clean Procedures
After the cycle, allow the oven to cool completely before wiping away any ash residue and ventilating the kitchen for fresh air․
Allowing the Oven to Cool Completely
Following the self-clean cycle, it’s crucial to allow your GE oven to cool down entirely before attempting any post-cleaning procedures․ The self-clean process reaches extremely high temperatures, posing a burn risk if handled prematurely․ Resist the urge to open the door immediately; patience is key․
Complete cooling can take several hours, depending on the cycle duration and your oven model․ Ensure the oven is cool to the touch before proceeding to wipe away ash residue or perform any other maintenance tasks․ Safety first!
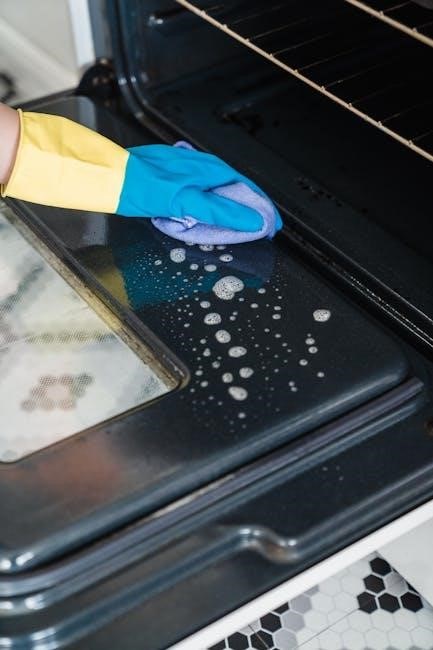
Wiping Away Ash Residue
Once the GE oven has cooled completely after the self-clean cycle, a fine layer of ash residue will likely remain․ Use a damp cloth or sponge to gently wipe away this ash from all interior surfaces – the walls, floor, and door․ Avoid abrasive cleaners or scouring pads, as these can damage the oven’s finish․
For stubborn residue, a paste of baking soda and water can be effective․ Ensure all ash is removed before using the oven again for optimal cooking performance․
Ventilating the Kitchen
During and after the self-clean cycle, your GE oven may produce some odors and potentially a small amount of smoke․ Proper kitchen ventilation is crucial to dissipate these․ Open windows and turn on the range hood fan to ensure adequate airflow throughout the cleaning process and cooling period․
This helps maintain good air quality and minimizes any lingering smells, creating a more comfortable cooking environment once the oven is ready for use․

Safety Precautions During Self-Cleaning
Avoid contact with hot surfaces, keep children and pets away, and address any smoke or unusual odors immediately during the self-clean cycle․
Avoiding Contact with Hot Surfaces
During the self-clean cycle, your GE oven reaches extremely high temperatures – potentially causing severe burns․ Never touch the oven interior or exterior surfaces while the cycle is active or immediately after completion․ Allow ample cooling time before attempting any cleaning or inspection․
Exercise extreme caution around the oven door, as it will become very hot․ Keep flammable materials away from the oven during and after the cycle to prevent fire hazards․ Prioritize safety to ensure a worry-free cleaning experience․
Keeping Children and Pets Away
The self-clean cycle generates intense heat, posing a significant risk to children and pets․ Strictly supervise or prevent access to the kitchen during the entire cleaning process, including the cooling period․ The oven’s exterior becomes hot, and fumes can be irritating․
Ensure a safe distance is maintained to avoid accidental burns or inhalation of potentially harmful vapors․ Prioritize their well-being by creating a secure environment while your GE oven undergoes the self-clean cycle․
Addressing Smoke or Unusual Odors
Some smoke or odor during the self-clean cycle is normal, especially with heavily soiled ovens․ However, excessive smoke or a burning plastic smell requires immediate attention․ If this occurs, turn off the oven and allow it to cool completely before opening the door․
Ventilate the kitchen thoroughly․ Contact GE customer support if the issue persists, as it could indicate a potential problem with your electric oven’s components․
Troubleshooting Common Issues
Common problems include failure to reach temperature, error codes during the cycle, or a malfunctioning door lock․ Consult your GE oven’s manual for solutions․
Oven Not Reaching Cleaning Temperature
If your GE oven fails to reach the necessary cleaning temperature during the self-clean cycle, several factors could be at play․ First, ensure the oven door is completely and securely locked; a loose latch prevents proper heating․ Verify the electrical connection is stable and the oven receives adequate power․
Also, excessive food residue can hinder the heating process․ A prolonged pre-clean cycle or manual removal of large debris might be necessary․ If the issue persists, consult the GE manual or contact customer support, as it could indicate a faulty heating element or control board․
Error Codes During Self-Clean Cycle
Encountering error codes during your GE oven’s self-clean cycle signals a potential issue requiring attention․ These codes, displayed on the control panel, are diagnostic tools․ Refer to your oven’s user manual to decipher the specific meaning of each code․ Common causes include a faulty door latch switch, a malfunctioning temperature sensor, or issues with the heating element․
Attempting to reset the oven by disconnecting power for a few minutes may resolve minor errors; However, persistent codes necessitate contacting GE customer support for professional assistance and potential repairs․
Door Lock Malfunction
A malfunctioning door lock during the self-clean cycle is a serious safety concern with your GE oven․ The lock must engage to maintain high temperatures․ If the door doesn’t lock, the cycle won’t start․ Conversely, if it remains locked after cooling, do not force it open․
First, ensure nothing obstructs the latch․ If the issue persists, disconnect power and contact GE customer support․ Attempting self-repair could be dangerous and void your warranty․
Maintaining Oven Cleanliness Between Cycles
Regular wipe-downs and immediate spill cleanup are crucial for maintaining a clean GE oven, reducing the frequency of self-clean cycles needed;
Regular Wipe-Downs
To maintain your GE oven’s cleanliness, perform routine wipe-downs after each use․ This prevents food residue from baking onto surfaces, making future cleaning easier․ Use a damp cloth with mild dish soap to wipe interior walls, the oven door, and the bottom․ Avoid abrasive cleaners, as they can damage the oven’s finish․ Consistent, quick wipe-downs significantly reduce the need for frequent self-clean cycles, prolonging your oven’s lifespan and ensuring optimal cooking performance․ A little effort goes a long way!
Spill Prevention and Immediate Cleanup
Preventing spills is key to minimizing oven cleaning․ Use appropriately sized cookware and avoid overfilling dishes․ However, accidents happen! Immediately clean up spills as they occur, while the oven is cool․ This prevents baked-on residue that requires intense cleaning․ For minor spills, a damp cloth often suffices․ For larger messes, use a plastic scraper to gently remove debris before wiping․ Prompt cleanup reduces odors and maintains a hygienic cooking environment within your GE oven․
Using Oven Liners (If Applicable)
GE doesn’t universally recommend oven liners for self-cleaning models, as some materials can cause damage at high temperatures․ If using a liner, ensure it’s specifically designed for self-cleaning ovens and follow manufacturer’s instructions carefully․ Improper liners can hinder heat distribution or release harmful fumes during the self-clean cycle․ Always prioritize safety and consult your oven’s user manual before using any liner product․
GE Oven Manual Resources
Access your GE oven’s model number for online manual downloads and detailed self-clean instructions․ Contact GE customer support for further assistance․
Locating Your Oven’s Model Number
Finding your GE oven’s model number is crucial for accessing the correct user manual and specific self-cleaning instructions․ Typically, this number is located on a label affixed to the frame of the oven door․ Open the door and carefully inspect the edges․
Alternatively, the model number might be on the back of the oven itself, requiring you to pull the oven slightly away from the wall․ Record this number accurately, as it’s essential when downloading the manual online or contacting GE customer support for assistance with your self-clean feature․
Downloading the User Manual Online
Once you’ve located your GE oven’s model number, downloading the user manual is straightforward․ Visit the official GE Appliances website and navigate to the support section․ Enter your model number into the search bar to find the corresponding manual․
This manual contains detailed instructions, including specific guidance on utilizing the self-cleaning cycle, safety precautions, and troubleshooting tips․ Downloading provides convenient access to all self-clean related information for your electric oven․
Contacting GE Customer Support
If you encounter issues with your GE oven’s self-cleaning feature or require further assistance, GE Customer Support is readily available․ You can reach them through their official website, where a live chat option and a contact form are provided․
Alternatively, you can call their dedicated helpline for direct support regarding self-clean cycle instructions, error codes, or any concerns related to your electric oven’s functionality․
Specific GE Oven Series Instructions
GE oven series, like Profile, Slate, and Stainless Steel, may have slightly different self-clean instructions; consult your model’s user manual for details․
Profile Series Self-Clean Instructions
GE Profile ovens boast advanced self-clean features․ Begin by removing racks and accessories, then select the desired cycle length – light or heavy – via the control panel․ Ensure the oven door securely locks before the high-temperature process initiates․
Monitor for normal sounds and smells, avoiding opening the door during operation․ Post-cycle, allow complete cooling before wiping away ash residue and ventilating the kitchen․ Always refer to your specific model’s manual for detailed instructions and safety precautions․
Slate Series Self-Clean Instructions
GE Slate ovens offer a streamlined self-clean experience․ Prior to starting, remove all cookware and accessories from the oven interior․ Utilize the control panel to choose between light and heavy self-clean cycles, based on soil level․ Confirm the oven door is fully locked for safety․
During the cycle, avoid interrupting it․ After cooling, wipe away any remaining ash and ensure proper kitchen ventilation․ Consult your manual for specific instructions related to your Slate model and safety guidelines․
Stainless Steel Series Self-Clean Instructions
GE Stainless Steel ovens feature a convenient self-clean function․ Begin by removing all racks, baking stones, and cookware․ Select the desired self-clean cycle duration – light for minor cleaning, heavy for significant buildup – via the control panel․ Ensure the oven door securely locks before the cycle initiates․
Avoid opening the door during operation․ Once cooled, wipe away ash residue and ventilate the kitchen․ Refer to your manual for detailed instructions and safety precautions specific to your Stainless Steel model․
Understanding Self-Clean Cycle Types
GE ovens offer Light, Heavy, and Steam Clean options․ Light is for quick touch-ups, Heavy for intense cleaning, and Steam Clean for lighter messes․
Light Self-Clean Cycle
The Light Self-Clean cycle on your GE oven is ideal for maintaining a relatively clean oven with minimal effort․ This shorter cycle utilizes lower temperatures, making it perfect for light spills and everyday residue․ It typically runs for around two to three hours, consuming less energy than the Heavy Self-Clean option․
While effective for routine cleaning, it may not remove heavily baked-on food or grease․ Remember to remove racks before initiating this cycle for best results and to prevent potential damage․
Heavy Self-Clean Cycle
The Heavy Self-Clean cycle on your GE oven is designed for tackling significant baked-on grease and food residue․ This cycle employs extremely high temperatures, typically exceeding 900°F, to burn away stubborn soils․ It’s a longer process, often lasting three to four hours, and consumes more energy than the Light Self-Clean option․
Always remove oven racks and accessories before initiating this cycle․ Ensure proper kitchen ventilation due to potential odors during the high-temperature cleaning process․
Steam Clean Option (If Available)
Some newer GE ovens feature a Steam Clean option, a gentler alternative to the high-heat self-clean cycles․ This method utilizes steam to loosen light soils and spills, making them easier to wipe away․ It’s a quicker process, typically taking around 30 minutes, and uses significantly less energy․
To use Steam Clean, pour approximately one cup of water into the oven floor and select the Steam Clean cycle on your oven’s control panel․

Cleaning the Oven Exterior
Maintain your GE oven’s appearance by regularly cleaning the control panel, oven door glass, and stainless steel exterior with appropriate cleaners․
Cleaning the Control Panel
The control panel of your GE oven requires gentle cleaning to maintain its responsiveness and appearance․ Avoid abrasive cleaners, as they can scratch the surface․ Instead, dampen a soft cloth with warm water and a mild dish soap solution․ Carefully wipe down the control panel, paying attention to areas with grease or food splatters․
Ensure the oven is turned off before cleaning․ For stubborn stains, a specialized appliance cleaner may be used, following the manufacturer’s instructions․ Dry the panel thoroughly with a clean, dry cloth to prevent water spots and ensure proper functionality․
Cleaning the Oven Door Glass
Maintaining a clear oven door glass enhances visibility while cooking․ For routine cleaning, use a glass cleaner specifically designed for ovens, or a mixture of warm water and vinegar․ Apply the cleaner to a soft cloth and gently wipe the glass surface, avoiding abrasive materials that could cause scratches․
For baked-on residue, a paste of baking soda and water can be effective․ Let it sit for a short period before wiping clean․ Always ensure the oven is cool before cleaning the glass․
Cleaning the Stainless Steel Exterior
To preserve the sleek appearance of your GE oven’s stainless steel exterior, regular cleaning is crucial․ Use a stainless steel cleaner specifically formulated for appliances, applying it with a soft microfiber cloth, following the grain of the steel․
Avoid abrasive cleaners or scrub brushes, as they can scratch the surface․ Wipe away fingerprints and smudges promptly to prevent buildup․ Rinse with water and dry thoroughly for a spotless finish․